












Your cart is empty
Pick a product to get started. Design it online or upload your own file.
Browse all productsShop by product
Need something custom? Request a quote
This is a demo store for testing purposes — no orders shall be fulfilled. Dismiss
Skip to content

Shop by product
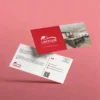
Business Cards
Thick stocks, rounded corners and raised finishes.
Flyers
Four sizes, from pocket A6 up to A4.
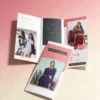
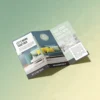
Brochures
Half fold, roll fold and Z fold layouts.
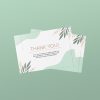
Postcards
Postcards and thank you cards.
Posters
A3, A2 and A1. Short runs welcome.
Banners & Signage
Pull-up banners, corflute signs and mesh banners.
Stickers & Labels
Circle, square and rectangle stickers.
Stationery
Letterheads for your business.
Online designer
Design it in your browser.
Pick a product, start from a template and make it yours. Already have a print-ready file? Upload it on the product page.
Start designingDesign and order
Get support
Guides and policies
Real people, based in Victoria. Most orders dispatch within 24 to 48 hours.
No products in the cart.
Your cart is empty
Pick a product to get started. Design it online or upload your own file.
Browse all productsShop by product
Need something custom? Request a quote
Simple rules for print-ready artwork. Follow them and your job goes straight to press. Miss one and we email you before anything prints.
Get these right and most jobs sail through. The guides below cover the detail for each product.
One print-ready PDF per design.
No RGB, LAB or Pantone. Everything in CMYK.
Photos at 300dpi at the size they print.
Run backgrounds 3mm past the trim. 5mm for booklets and signs.
Keep text and logos at least 3mm inside the trim.
Embed or outline every font before you export.
Pick a guide on the left. Everything loads on this page, so you can jump between them instantly.
Every file we print is checked against this list. Tick it off before you upload and your job goes straight to press. If something is missing, a real person emails you before anything prints.
We print from PDF files. Export a high-quality print PDF from InDesign, Illustrator, Affinity or similar. A print preset such as PDF/X-4 works well.
Working in Word, Canva or another app? Export to PDF first. Or skip the file altogether: choose a product and design it online.
Photos and illustrations should be 300dpi at the size they will print. Images saved from websites are usually 72dpi and print soft or pixelated.
Enlarging a small image does not add detail. Start with the biggest original you have.
Large signs are the exception. See large format and signage.
Presses print with four inks: cyan, magenta, yellow and black (CMYK). Convert every colour in your file to CMYK before you export. That includes RGB, LAB and Pantone (PMS) spot colours.
Anything left in RGB gets converted at print time, and bright colours can shift or go dull.
Every font must be embedded in the PDF or converted to outlines. If a font is missing, a default font gets swapped in and your layout changes.
Bleed is extra background that runs past the edge of your page. We trim through it, so there is no white sliver if the cut moves slightly. Include crop marks so we know where the edge is.
| Product | Bleed |
|---|---|
| Business cards, flyers and most printed products | 3mm |
| Stapled (saddle-stitched) booklets | 5mm |
| Large format and signage, single sided | 5mm |
| Large format and signage, double sided | 10mm |
Set your document to the finished size you ordered, then add bleed around it. An A5 flyer trims to 148 × 210 mm. With 3mm bleed on every side, the page is 154 × 216 mm.
Your page count must match your order. Put every page of one design in a single PDF. Different designs (we call them kinds) each get their own PDF.
Spot UV, raised gloss and foil areas go on their own page in the PDF, drawn in a spot colour. See finishes.
Die cut, fold and perforation lines sit on top of the artwork as a spot colour, set to overprint. See die cutting, folds and perforations.
Not sure your file ticks every box? Upload it anyway. We check every file and will tell you exactly what needs fixing. We can often fix small issues for you and will let you know about any cost first.
A few layout habits that stop good designs going wrong on press. They apply to almost everything we print.
Cutting and folding can shift slightly from sheet to sheet. Keep text, logos and anything important at least 3mm inside the trim line. Only backgrounds and images that are meant to bleed should go past it.
A thin border near the edge shows every millimetre of movement. On double-sided jobs the front and back can shift 1 to 2mm, so holding an even border on both sides is not realistic.
If you want a border, make it thick and keep it well inside the safe zone.
On double-sided jobs, the top of the front and the top of the back sit at the same end of the sheet. Set up page 2 the same way up as page 1. Do not rotate the back.
Plain black (0/0/0/100) looks grey and patchy across large areas. Mix in some cyan, magenta and yellow for a deep, solid black.
| Stock | Rich black (C/M/Y/K) |
|---|---|
| Heavier stock, such as cards and covers | 60/50/50/100 |
| Lighter stock, such as flyers and text pages | 30/0/0/100 |
Keep small text in plain black. Rich black on fine type can look fuzzy if the inks are a hair out of line.
Screens glow and paper does not, so colours will look different in print. Bright blues, greens and oranges shift the most.
Choose colours by their CMYK values rather than by eye. A printed CMYK swatch book is the most reliable guide. If an exact colour match matters, talk to us before you order.
Cards follow the artwork checklist. Here is what is specific to cards, including team orders and cards with special finishes.
Supply both sides in a single PDF.
Ordered lamination on one side only? It goes on page 1.
Ordering cards for a team? Each name needs its own PDF. Five people means five PDFs, each with a front and back. Please do not put them all in one file.
Supply a three-page PDF for each name:
Full setup steps are in finishes.
We offer standard round corners. Keep the same safe zone as a square card, because the corners trim away more of the edge. Need a custom corner radius? Ask us for a quote.
Special finishes are applied from a separate mask that shows exactly where they go. Get the mask right and the finish lines up perfectly with your print.
Your printed artwork stays normal CMYK. The finish goes on a separate page in the same PDF, drawn in one spot colour at 100%. Anything in that colour gets the finish. Everything else does not.
The mask page must match your artwork exactly: same page size, same crop marks, same position.
| Finish | Name the swatch |
|---|---|
| Spot UV (flat gloss) | Spot UV |
| Raised gloss you can feel | Scodix |
| Metallic foil | Metal |
The swatch names matter. Spell them exactly as shown.
These steps use InDesign. Other layout apps work the same way.
Spot UV, set its type to Spot, and apply it to everything on the layer at 100% opacity.Graphics placed from Illustrator often cannot be edited in InDesign. Set the Spot UV swatch and overprint in Illustrator before you place them.
Raised gloss is built up in layers, so you can feel it. The setup is almost the same as spot UV.
Scodix and apply it at 100% opacity.Metal and apply it at 100% opacity.3mm safe zone.Custom shapes, pocket folders and tear-off coupons all need cut lines in your file. Here is how to set them up so they cut but never print.
Where we have a standard shape, start from our dieline template. Ask us for it before you begin. Want a custom shape? Send us the details for a quote.
Making your own shape? Draw the dieline, print it, cut it out and fold it before you lay out any artwork. Then test it again with the finished design.
Dieline.Use a different spot colour for each type of line: one for cuts, one for creases or folds, and one for perforations. All solid strokes, all set to overprint.
On double-sided jobs, the back is a mirror of the front. Check that perforations land in the right place on the back, centre your artwork on each page so the lines match up, and include the full dieline on both sides.
How to order your pages so your booklet or brochure comes back in the right sequence, the right way up.
We print head to head. The top of each front page and the top of its back page sit at the same end of the sheet. Set every page upright in your file.
8, 12 or 16.5mm bleed on stapled booklets.Supply two PDFs:
Spine width depends on the page count and the paper. Tell us both and we will give you the exact spine measurement before you finish the cover.
Set folded brochures up as spreads at the flat size, not as separate panels. A DL tri-fold, for example, is a flat A4 sheet (297 × 210 mm) with two folds.
On a roll fold, the panel that tucks inside should be about 2mm narrower than the others so it folds cleanly. Ask us for a template and the panel sizes are done for you.
Banners, posters, corflute, rigid signs and stickers follow the same rules as everything else, with a few changes for size.
300dpi is ideal. Big signs are read from further away, though, so lower resolution works fine and keeps file sizes manageable. 150dpi suits most large signage. Use this as a minimum:
| Viewing distance | Minimum resolution |
|---|---|
0.6m | 300dpi |
1m | 180dpi |
1.5m | 120dpi |
2m | 90dpi |
3m | 60dpi |
5m | 35dpi |
10m | 18dpi |
15m | 12dpi |
50m | 4dpi |
5mm bleed for single-sided prints and 10mm for double-sided.Cut lines sit on top of the artwork in a spot colour, set to overprint. Use one spot colour for cuts and a second for creases.
The shape affects the price, so pick the right type when you order:
| Type | What it covers |
|---|---|
| Basic | One smooth cut with no lifts, like a circle or rounded rectangle. Adding even one drill hole moves it up a level. |
| Standard | Simple irregular shapes, or shapes with cut-outs or drill holes. |
| Detailed | Outlines of people, lettering, or several stickers laid out on one sheet. |
| Complex | Boxes and display stands that need both cutting and creasing. |
A kiss cut goes through the sticker but not the backing, so it peels off easily. Make your artboard at least 10mm bigger than the sticker. A 50mm round sticker goes on a 60 × 60 mm artboard.
On clear material, like window decals, white ink sits behind the colour so it looks solid rather than see-through. Supply a white ink layer that is:
WHITE, shown in a visible colour on screen.Include every area that needs white, both white-only areas and areas where colour needs to look solid.
| Option | Best for |
|---|---|
| CMYK + white | Clear material stuck onto a solid surface and read from the printed side. |
| Reverse-printed CMYK + white | Clear material read through from the other side, like a decal on the inside of a shop window. |
Eyelets are punched near the edges and corners of banners. Keep text and logos well clear of those areas. Ask us for the eyelet layout for your banner size.
White Ink, set to overprint, on a layer above the CMYK.White Ink spot colour.10pt. Minimum line weight 1pt.580 × 1000 mm. Fill it with as many designs as you like.Flags, media walls, fabric displays and tablecloths. Same core rules as large format, plus a few things that change when you print on fabric.
Fabric follows the same viewing-distance rule as large format. 300dpi is ideal and 150dpi suits most large fabric prints. Seen from 2m or more, 90dpi is the minimum.
5mm bleed for single-sided prints and 10mm for double-sided.Every fabric product has its own template showing hems, pole pockets and safe areas. Ask us for the one that matches your product. We have templates for:
Keep dielines as a spot colour, set to overprint, as they appear in the template.
Some fabrics are woven loosely or made from mesh so air can pass through outdoors. That softens very small text and fine detail. For clear results:
18pt. 24pt or larger is better.Most fabric signs are read from a few metres away at shops, events and expos. Big type and a clear hierarchy beat lots of small detail.
Lightweight fabrics let light through. Graphics can look lighter when lit from behind, and a single-sided flag shows a faint mirror image on the back. Need full coverage or a true double-sided print? Choose a blockout (Silverback) fabric.
Keep text and logos clear of the edges where eyelets go. Ask us for the eyelet layout for your product.
Roll labels follow the same artwork rules as everything else. The main extra is which way your labels come off the roll.
Set up your file at the finished label size with bleed and a safe zone, following the artwork checklist. CMYK colour, 300dpi images and fonts embedded or outlined.
If your labels go on by machine, the edge that comes off the roll first matters. For rectangular labels, the leading edge is always the first measurement in the size. A 50 × 100 mm label comes off the roll 50mm edge first.
Applying labels by hand? Roll direction will not matter to you.
Clear and silver foil labels use white ink with CMYK to control what is see-through or shiny. You supply a white ink layer as a spot colour, set to overprint, that shows where white should print. Areas without white stay clear, or metallic on silver.
Ask us for the setup guide before you start. It is easy to get backwards.
We stock dies for a wide range of sizes, so a standard size is quicker and cheaper than a custom shape.
25mm to 150mm.30mm to 100mm.40 × 10 mm up to A4, in portrait or landscape.Ask us for the template that matches your size.
Laser-cut labels are printed the same way but finished on a different machine. That opens up custom shapes and finishes like foil and raised gloss. They are ordered and set up differently, so talk to us before you design.
Envelopes are printed after they are made, which changes what is possible. Here is how to design for them.
On this page Keep ink coverage light Sizes Flaps and seals Windows
Standard pricing covers logos, return addresses and light artwork that stays away from the edges.
Heavy solid colour, or images that run off the edge, need an extra printing plate. That adds a setup fee. We will quote it before anything prints.
| Envelope | Size |
|---|---|
| DL | 220 × 110 mm |
| DLX | 235 × 120 mm |
| C6 | 114 × 162 mm |
| C5 | 162 × 229 mm |
| C4 | 229 × 324 mm |
| B4 | 250 × 353 mm |
Seals come in moist seal (lick and stick) or peel and seal.
| Envelope | Window size |
|---|---|
| DL and DLX, standard window | 95 × 28 mm |
| DL and DLX, barcode window | 95 × 38 mm |
| C5 wallet, window | 95 × 38 mm |
| C4 wallet, barcode window | 95 × 38 mm |
Keep artwork clear of the window area. Ask us for the template for your envelope, which shows the exact window position.
Pick your format, grab the template, then set up your pages in order.
On this page Calendar formats Set up your pages
| Format | Details |
|---|---|
| DL fridge calendar | 350gsm artboard with a magnet on the back. |
| Desk tent calendar | Die cut from a flat 297 × 210 mm sheet of 350gsm artboard. |
| Desk calendar, wire bound | DL or A5. 150gsm pages on an unprinted 350gsm stand. |
| Wall calendar, wire bound | A5, A4 or A3 on 150gsm, with a hanger and thumb notch. |
| Wall calendar, stapled | A4 or A3, 28 pages with a drill hole for hanging. 150gsm inside pages with a 350gsm cover. |
Bleed is extra background that runs past the edge of your design. We trim through it so there is no white edge if the cut moves slightly. Most products need 3mm on every side. See the artwork checklist.
Screens make colour from light (RGB). Presses make colour from four inks (CMYK). Some bright screen colours cannot be printed, so convert your file to CMYK before you export to see what you will really get.
A PDF is best. From Canva, download as PDF Print with crop marks and bleed turned on. From Word, save as PDF. If you only have a JPG or PNG, make sure it is full size, includes bleed and is 300dpi. We check every file either way.
We check every file before it prints. If we spot a problem, we email you with what is wrong and how to fix it. We can often fix small issues for you and will tell you about any cost first.
No. To keep things moving, we don't send proofs. A real person checks every file, and if it is print-ready it goes straight to print. If something needs fixing, we email you before printing. Check your design closely before you order, especially names, numbers and dates.
Yes. Choose a product and the online designer shows its ready-made layouts. Or ask us for a blank template with bleed and safe zones marked for your product.
We check every file before it prints. If something needs fixing, we email you with what is wrong and how to fix it.